Everything you configure lives in three tabs: Key Mapping, Keyboard Shortcuts, and Settings. This guide covers how to use each feature once you're connected. For initial setup, see the Support guide.
The main window includes a live visual map of your keyboard. Fader keys (F1 - F8) show a moving fader handle that syncs with your DAW's faders. Every other assigned key — mod keys, transport, banking, and so on — shows as a colored indicator that fills in solid the moment you press or activate it. It's a handy at-a-glance reference for where everything lives, and it'll come up again throughout this guide.
The keyboard diagram with a factory preset loaded
Slide your finger up and down on any key assigned to a fader (the Y-axis / Slide expression on your MPE keyboard) to move that track's fader in your DAW. 8 fader tracks are active at once. Experiment with finger pressure or your keyboard's sensitivity settings until you get a smooth response.
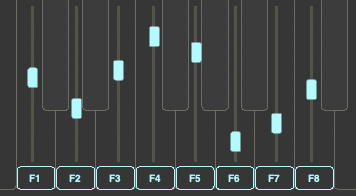
The 8 fader keys on the keyboard diagram
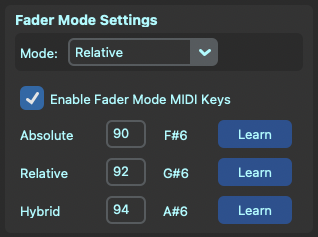
Impetus has three fader modes, switchable from a dedicated key or the Key Mapping tab:
Switch between them from the Key Mapping tab or a dedicated key to find the best mode for your mixing situation. The Fader Mode drop-down in the Key Mapping tab still works even if you've disabled the Fader Mode MIDI Keys.
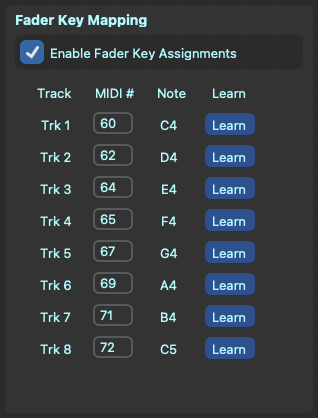
The 8 fader key assignments
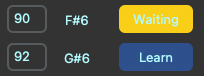
Absolute / Relative / Hybrid key assignments
Mod keys change what a fader key does while they're held — think of them like a Shift key for your fader keys.
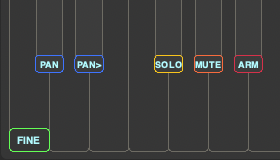
The mod keys on the keyboard diagram
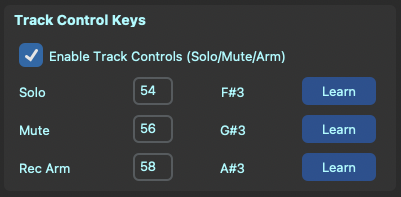
Solo / Mute / Record Arm (Arm): hold the Solo, Mute, or Arm mod key, then press the fader key for the track you want to affect. That toggles Solo/Mute/Arm for that specific track in your DAW. Release the mod key and fader keys go back to controlling faders normally.
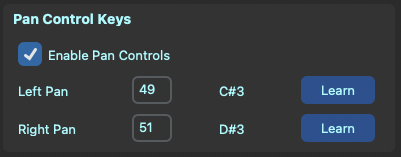
Pan: hold the Pan key, then move (slide) the fader key for the track you want to pan — the same hold-then-touch pattern as Solo/Mute/Arm, but driven by movement instead of a single press.
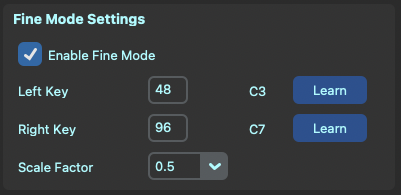
Fine Mode: increase fader resolution for more precise fader control — useful for fine adjustments. The Scale Factor control (0.5 / 0.25 / 0.1) sits alongside the Fine Mode key assignments in the Key Mapping tab — lower values mean finer, slower fader movement while Fine Mode is active.
Solo, Mute, and Arm assignments
Left Pan and Right Pan assignments
Fine Mode key assignments
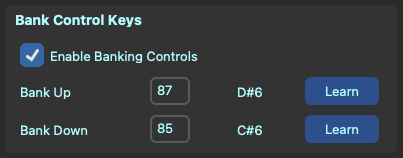
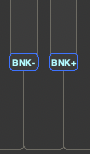
If your session has more than 8 tracks, Bank Up and Bank Down shift which 8 tracks are currently mapped to your fader keys — like paging between groups of channel strips on a hardware console. Your key assignments stay the same; only which tracks they're pointing at changes.
Bank Up / Bank Down assignments
Bank keys on the keyboard diagram
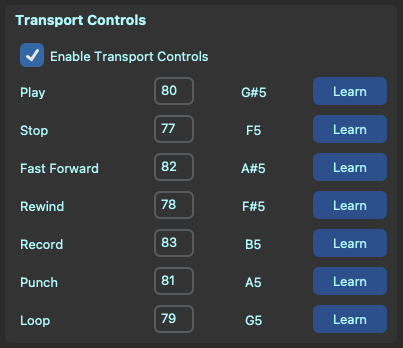
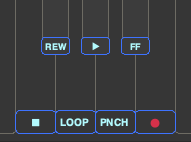
Play, Stop, Record, Punch, and Loop each work as a simple press. Different DAWs react differently to Fast Forward and Rewind. For instance, Pro Tools will rewind continuously while the Rewind key is held and stop rewinding when released. Logic Pro will rewind when the key is tapped, and if the key is held, it will rewind faster and faster.
This kind of DAW-specific behavior isn't limited to Fast Forward and Rewind — other transport functions can respond differently depending on which DAW you're running. Experiment with each key in your own setup to get a feel for how it behaves.
Transport key assignments
Transport keys on the keyboard diagram
This is where every key assignment lives, organized by category (Fader Mode, Fader Keys, Fine Mode, Pan Control, Bank Control, Transport, Track Control Mod keys).
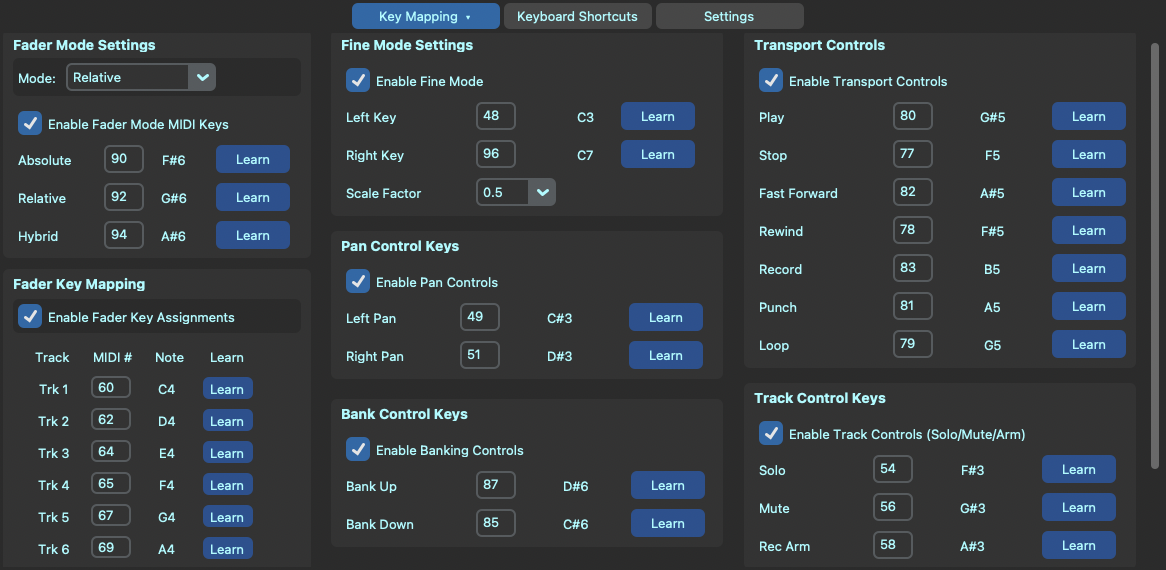
The full Key Mapping tab
Assigning a key — two ways:
A Learn button mid-assignment
Customizing your layout: each category can be disabled entirely if you don't use it — for example, turn off Pan Controls to free up those keys for something else, or turn off Fine Mode if you never use it. Disabled categories disappear from the duplicate-detection system too, so their old key assignments become available again.
To disable a single function within a category, simply enter 0 in the number box, or reassign that MIDI key to a different function and accept the conflict detector pop-up.
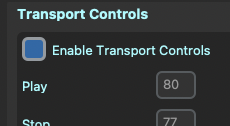
A category on/off toggle

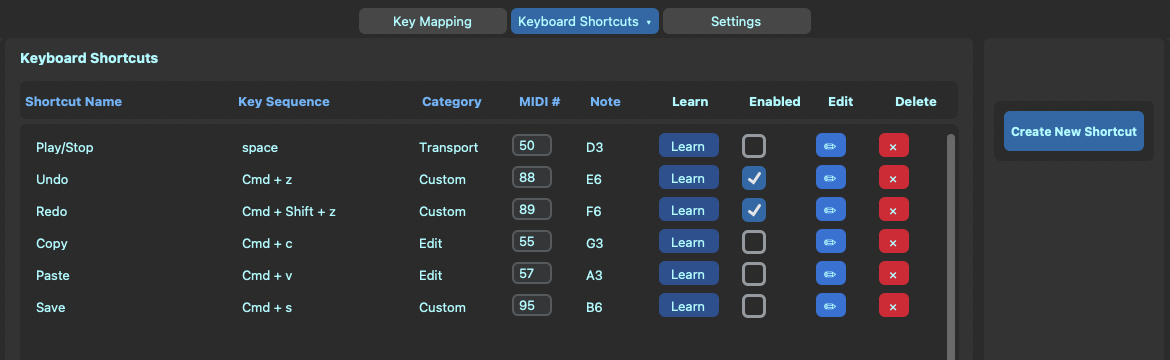
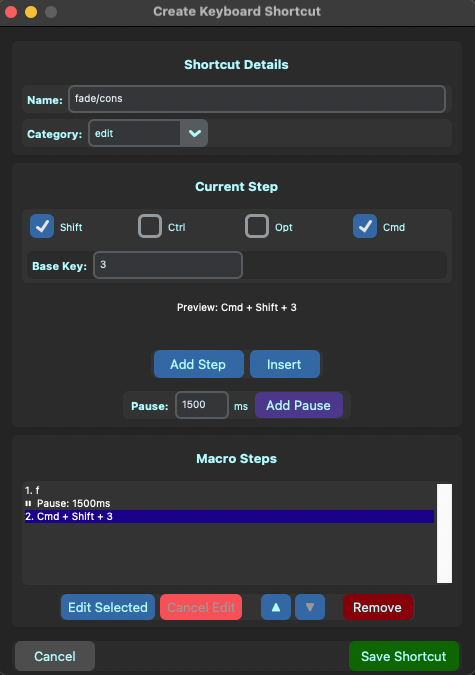
Keyboard Shortcuts let you trigger any app-specific or system-wide key command — or a whole sequence of them — from a single key on your MPE keyboard, independent of any DAW control surface feature. They will also work outside of your DAW, in any software in focus that uses the assigned shortcuts.
The Keyboard Shortcuts tab
Editing
In the Keyboard Shortcuts list, click the Edit button to reopen any existing shortcut or macro to add, remove, or reorder its steps, or to rename it.
Assigning to a key
Every shortcut/macro needs a device key the same way fader and mod keys do — in the Keyboard Shortcuts list, use Learn, or enter the MIDI note manually.
Enabling / disabling
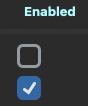
Toggle a shortcut off without deleting it — useful for temporarily freeing up a key, or turning off ones you're not using, but want to keep.
Sorting the list
Click any column header — Shortcut Name, Key Sequence, Category, MIDI #, Note — to sort the list by that column. Handy for grouping everything by Category, or finding what's assigned to a particular key.
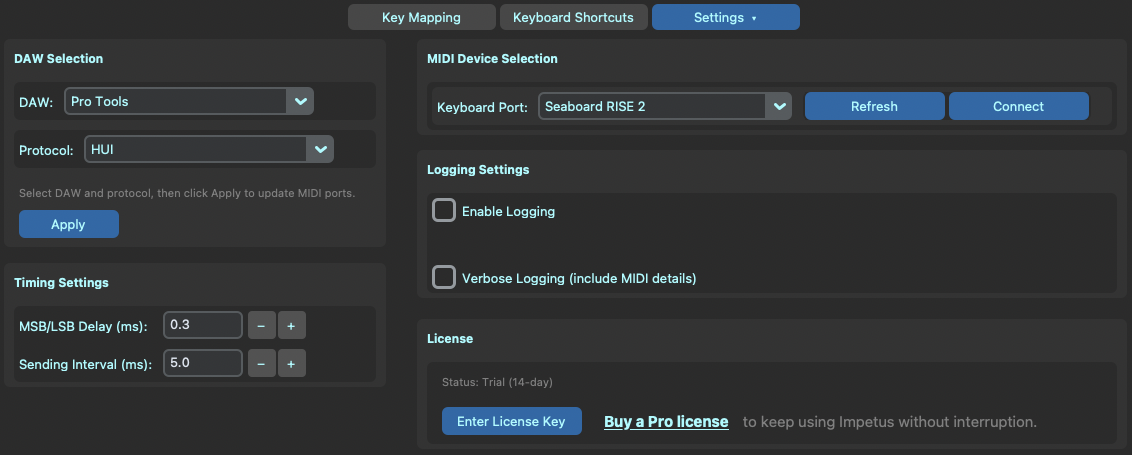
This is home base for connecting Impetus to your keyboard and DAW, and for a few settings you may come back to after setup. For setup instructions, see the Support guide.
The full Settings tab
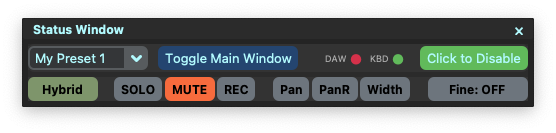
A small, separate floating window you can leave open while you work, so you don't need the full main window open on top of your DAW. It shows:
Show or hide it from the Window menu, or from its own toggle button in the main window.
The Status Window
Presets store a full set of key mappings and shortcuts together, so you can switch your whole layout in one click.
The preset selector
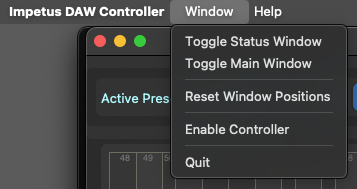
Impetus adds two menus to the top menu bar:
The Window menu
For setup and connection issues, check the Support guide first. Anything else — email us with your macOS version, keyboard model, and DAW, and we'll help you get running.